
PyTorch is a popular open-source and high-performance machine learning framework developed primarily by Facebook’s AI Research team (FAIR). It is the most widely used framework which allows developers and researchers to create and deploy deep learning models for a variety of tasks, such as image classification, image segmentation, text processing etc. Conv2D is a class used to represent the convolutional layer in the neural networks. It is a simple yet useful implementation of the convolutional neural networks. This tutorial will show you how to get started with conv2d class of pytorch and build neural network architectures.
Purpose of using NN in PyTorch
“nn.Conv2d” is a building block of neural network layers. Convolution 2D is an operation that is performed on a 2-dimensional matrix within a system. However, Convolutional Neural Networks (CNNs) implemented using PyTorch’s nn module are powerful classifiers that mimic the biological neuron system. The core idea behind these models is to use one or more layers to augment previous layers using non-linearities to filter out data from the input layer.
To get started with PyTorch, you need to import the necessary libraries into your Python script environment. However, before you can successfully execute PyTorch nn Conv2d operations by importing libraries, you need to install the PyTorch Python package in your Python environment. To install the PyTorch Python package, you can use the following commands in your Windows command prompt:
pip install torchvision
pip install torch
All set, you have successfully installed Pytorch Packages into your path, Now you can import the necessary Pytorch module into your working editor (working on Jupyter Notebook).
import torch
from torch.autograd import Variable
import torchvision.datasets as dsets
import torchvision.transforms as transforms
import torch.nn.init
Now moving to the topic of how to implement the convolution layer using Conv2d. We will discuss using different example codes.
How nn Conv2d work?
A CNN (convolutional neural network) is simply a 2D kernel(filter) that implements convolution over input data. In order to determine the values in each output node, the filter “convokes” over each group of pixels and multiplies corresponding elements. However, During training, CNNs learn how to predict by changing the values in the kernels: the structures that matter for prediction are learned by the network.
Convolutional layers operate In PyTorch as torch.nn.Conv2d. This module supports TensorFloat32 and returns tensor as output data-type.
m= torch.nn.Conv2d(in_channels, out_channels, kernel_size)The input to a 2D convolution layer must be of the size (Color bands, number of Channels, Height, Weight) of the input tensor.
These arguments influence the size and behavior of the output tensor.
- in_channels: refers to channels in input data.
- out_channels: number of channels generated after the data convolves.
- kernel_size: the filter size.
- stride: the “steps” of the filter pixels-wise.
- padding: The number of pixels that are added to the data when it is being processed by the CNN filter in order to accomplish the task.

Now you have got the basis of CNN2d in PyTorch, Now apply these operations on different examples. So Let’s get on board!
PyTorch nn conv2d handling input image
In the following example, the image is taken as input and implemented by the CNN kernel on an image data in PyTorch.
The input image is:

Here’s how the PyTorch implemented on an image:
- Import necessary libraries including torch, torch.nn, and PIL
- An additional PIL library is imported to deal with images.
- Apply convolution Conv2d() on the input data/image using the torch.nn.Conv2d()
- Set the image behavior in torch.nn.Conv2d() arguments.
- Input image of 3 channels/colors, output channels of image is set to 1, and kernel size set to 3 by 3.
- When an input has 3 channels, RGB mode will be assumed.
- Output channel is set to 1, so mode will display the image in i between 0-1 color. Where 0, maps to black and white maps to 1.
- The image opens a temporary name with the same file extension, on a supported application in Window.
# Importing Libraries
import torch
import torchvision
from PIL import Image
import torchvision.transforms as T
#(in_channels, out_channels, kernel_size)
conv = torch.nn.Conv2d(3, 1, (5*5))
# Read input image
img = Image.open('img.jpg') #RGB
# convert image to torch tensor
img = T.ToTensor()(img)
print("img size:", img.size())
# CNN operation on image
img = conv(img)
# convert image to PIL(pillow library) image
#it is the pillow supported library to handle image
img = T.ToPILImage()(img)
#disply image
img.show()
img size: torch.Size([3, 1822, 1728])
Exploring Conv2d parameter:
PyTorch nn conv2d set to unequal stride
A parameter of a convolutional neural network is Stride, which is a key part of a neural network designed for compressing images/input data. Moreover, During convolution, the strides parameter determines how fast the kernel traverses the input layer as it moves along the rows and columns. However, If a stride is the same(1,1) the kernel moves one row/column for each pixels/steps; if a stride is uneven (1, 2), the kernel travers one row and two columns for each pixels/steps.
Stride modifies the amount of tranverses (convolutions) over the images/input data.
Here is how the input image convolves on an uneven stride and produces an output image.
import torch
import torchvision
from PIL import Image
import torchvision.transforms as T
#(in_channels, out_channels, kernel_size)
#setting unequal stride=(2, 1)
conv = torch.nn.Conv2d(3, 1, (5*5), stride=(2,1))
# Read input image
img = Image.open('img.jpg') #RGB
# convert image to torch tensor
img = T.ToTensor()(img)
print("img size:", img.size())
# CNN operation on image
img = conv(img)
# convert image to PIL(pillow library) image
#it is the pillow supported library to handle image
img = T.ToPILImage()(img)
# Print the parameter list
print("mode = ",img)
#disply image
img.show()
img size: torch.Size([3, 1822, 1728])
mode = <PIL.Image.Image image mode=L size=426x450 at 0x1F6A3A6EBE0>
However, Here is the output image of even stride (4, 4), the kernel travers four rows and four columns for each pixel.
PyTorch nn conv2d set to Padding parameter
If an image is not normalized, then its pixel range will be 0 to 255, whereas if it has been normalized the pixel range will be 0 to 1. Hence, Padding normalizes the data/image between 0-1.
zero padding
In zero padding, the original input size is preserved. However, around the edges of the input images, we add zero-valued pixels as a border, hence the name zero padding.
When is padding set to 1.
Whenever you observe any standard network you will see that the padding is always 1. However, the reason is that padding adds some information to the input by itself, which is computationally expensive and increases the input size a lot, making the model heavy.
Padding is the process of placing extra pixels at the edge or boundary of the image/input data. However, zero padding adds zero values to every pixel. If zero padding is set to 1, then a one-pixel border will surround the original image with zero pixels values. Therefore, keep the original size of the data.
# Import library
import torch
import torchvision
from PIL import Image
import torchvision.transforms as T
#  input image
img = Image.open('img.jpg')
# convert the image to torch tensor
img = T.ToTensor()(img)
print(" image size:", img.size())
#(in_channels, out_channels, kernel_size)
con = torch.nn.Conv2d(in_channels = 3, out_channels = 3, kernel_size = 3, padding=1)
# CNN operation on image
img = con(img)
# convert image to PIL(pillow library) image
#it is the pillow supported library to handle image
img = T.ToPILImage()(img)
# Print the parameter list
print("mode = ",img)
#disply image
img.show()
image size: torch.Size([3, 1822, 1728])
mode = <PIL.Image.Image image mode=RGB size=1728x1822 at 0x1F6AB47D1F0>
PyTorch nn conv2d set to Bias parameter
Bias parameter is set to True
In estimation, bias measures how accurate the estimate is. So, High bias will result in less accuracy. However, when bias is set to True, after convolution processing, it returns output close to original data as add no extra layer of thickness to the image.
The bias vector will be added to the outputs if use_bias is set to True.
# Import library
import torch
import torchvision
from PIL import Image
import torchvision.transforms as T
#  input image
img = Image.open('img.jpg')
# convert the image to torch tensor
img = T.ToTensor()(img)
print(" image size:", img.size()) # size = [3, 466, 700]
#(in_channels, out_channels, kernel_size)
con = torch.nn.Conv2d(in_channels = 3, out_channels = 3, kernel_size = 3, bias=True)
# CNN operation on image
img = con(img)
# convert image to PIL(pillow library) image
#it is the pillow supported library to handle image
img = T.ToPILImage()(img)
# Print the parameter list
print("mode = ",img)
#disply image
img.show()
image size: torch.Size([3, 1822, 1728])
mode = <PIL.Image.Image image mode=RGB size=1726x1820 at 0x1F6AB47D7C0>
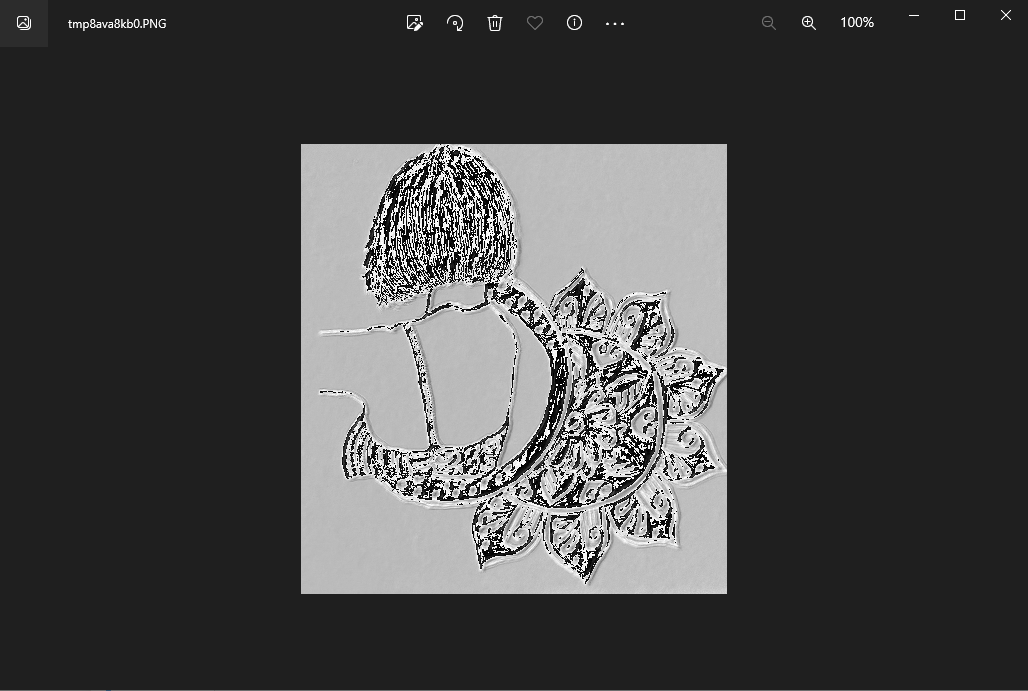
Combine parameters applied to image
The following image is the result when the parameters are set to:
- Input channel is 3 (RGB) and
- Output channel is also set to 3
- Kernel size is 3
- Stride is set to 2
- Padding is set to 1
- And bias is equal to True.
# Import library
import torch
import torchvision
from PIL import Image
import torchvision.transforms as T
#  input image
img = Image.open('img.jpg')
# convert the image to torch tensor
img = T.ToTensor()(img)
print(" image size:", img.size())
#(in_channels, out_channels, kernel_size)
con = torch.nn.Conv2d(in_channels = 3, out_channels = 3, kernel_size = 3,  stride=(2), padding=1, bias=True)
# CNN operation on image
img = con(img)
# convert image to PIL(pillow library) image
#it is the pillow supported library to handle image
img = T.ToPILImage()(img)
# Print the parameter list
print("mode = ",img)
#disply image
img.show()
image size: torch.Size([3, 1822, 1728])
mode = <PIL.Image.Image image mode=RGB size=864x911 at 0x1F6AB47D580>
On this page, we have covered the pytorch implementation of the two-dimensional CNN (convolutional neural network) for images. The article demonstrates how conv2D layer works and the adjustment of hyperparameters. For further questions, contact us. Let us know your feedback in the comments. Thankyou.